Personally, I think the system you use to haul your buddy out of a hole in a glacier should be the same as you would use to haul them up in any situation. Why? You learn one system, learn it really well, so its second nature and then you will have it nailed for that time you really need it.
This series follows on from the blog post about “What crevasse equipment”
In reality, we seldom need to use these rescue system, in most cases with good rope work we can reverse and drag our buddy out of the crevasse before they take a big drop or if they do go in they extract themselves by prusiking back out. To haul a person up a pitch or crevasse is going to take a lot of energy and time, think carefully before hauling as there might be an easier alternative. The only group that regularly use these systems are instructors and guides to help participants overcome crux moves.
The basic system regardless of equipment is a 3:1 pulley. This system works, but boy will you have to work and if your a bit of a wimp or your buddy has eaten too many pies you’re going to have to think about getting some gadgets or some tricks to help you along the way.
The basic 3: 1 pulley often referred to as a Z system is a working solution and if you’re using basic equipment, just the rope, carabiners and prusiks this system will have a good ratio of effect versus friction. If you try to build it out more, then the friction will exponentially increase and undo all your good pulling effort. To build out effectively you need pullies in the system to reduce friction.
Regardless of the terrain, be it a glacier, cornice, a hole in the snow or steep rock the system is the same, it’s only the belays that changes. On rock, you can build rock belays and on snow, you need to use snow anchors or if lucky find some ice to build an ice screw belay.
Essentially you need an anchor, an anchor that is solid and will not fail and then you build you 3:1 system to it. And then pull like crazy 🙂
The anchor is a howl subject and fieldwork experience in itself. On courses I run, we use a lot of time building different snow anchors, testing them, finding each anchors advantage and disadvantage, seeing there weaknesses and strengths. Placing a snow anchor is never going to be perfect, it will always be a compromise. In wet summer snow, you can get away with less precisely placed anchors, while the same set up in dry winter snow wouldn’t work all. It doesn’t matter how well placed the snow anchor is, the snow will always fail at some point. In most cases, maybe in all, if the anchor fails it fails catastrophically without warning.

Picture 2: Crevasse rescue: 3 to 1 – Z pulley system
Back to the simple 3:1 set up. Gadgets aside we are just using basic equipment:
2 x prusiks
2 x carabiners (At least one, in theory, should be a screw gate)
1 x rope
Obviously, we could swop things out, as this is “improvised rescue”. Instead of prusiks, we could use slings, preferable nylon as they grip better, but skinny spectra can also grip as well. If we don’t have screw gate carabiner we could use two open gates, with the gates opposite each other.
In Picture 2, Antonia has set up a 3:1 system attached to a deadman snow anchor. Ideally, she would be pulling the rope more in the direction of the anchor and inline with the rope running to her partner James, pulling in any other way reduces the effectiveness of the system.
1 = Carabiner (hopefully a screw gate) attached to the snow anchor. 2 = Prusik (ideally a knot called a “french”). 3 =Prusik (ideally a knot called “Klemheist knot” or called a “Viking” in Norway). 4 = open carabiner. 5 = Snow anchor (in this case a “deadman”)
This simple system is the basic starting block of any pulley system. The problem with this system is friction. It is a rather inefficient system because of friction and to haul your buddy out will take quite a lot of muscle power. In this case, Antonia will also have to pull up the hill. If she was able to attach another carabiner to the anchor she would be able to use the downhill to help her, although friction would increase in the system. Regardless of her best efforts, her partner James weighted over 100kg and it was not possible to haul him out of the crevasse. She would need another system which will be discussed later.

Picture 2: 3 to 1 pulley system
In Picture 2, we see a similar system using a micro-traction (1)(a pulley wheel with a grip so the rope can spin free in one direction but can’t in the other), a pulley wheel (2) and a metal prusik (Tibloc) (3). All this is in this case attached to a bolt belay (4).
Using these gadgets (pulley wheels and mechanical grips) reduces the friction markedly over our basic rope and carabiner set up. Here Alex drags me up a steep rock route but again he is pulling in an uphill direction and going against gravity. If he was able to attach another pulley wheel to the anchor he could start pulling down and use his muscle, body weight with gravity to help haul me up.
The problem with this system is you need some gadgets that weight a bit and most alpine climber are looking to go light and don’t need any extra grams. They also have a defined goal and can’t be used in other situation. Your basic prusiks can be used to climb a rope, abseil cord, or even tieing your shoes and loads more.
Discussion:
Even against your best muscle efforts it just might be impossible to haul your buddy up. In the case of crevasses, if the snow is overhanging and you buddy is free-hanging there is a chance the rope will cut the snow and when you pull him up he will jam under the overhanging snow, similarly if you haul your buddy up and he gets caught in a chimney or overhand it might be impossible to haul him. So in theory, they work, in practice, you might get caught up in a natural trap.
Test your gear! Nice shinny ropes with nice shinny prusiks don’t always grip together as well as you would like. Best to try your system at home to see it all works out before you need it in anger. The diameter of the prusiks should be less than the diameter of the rope your going to climb.
Getting extra help – building out the haul system:
It is possible to add in an extra sling or rope in this system to form a 5:1 or what is often more accurately described as a 3 + 2:1 system. In this case, a 120cm nylon sling is being used to form the extra built out section of the pulley (The 2 in the 3+2:1 system). It would be possible to use cord, for example, your abseil cord. Using a 120cm sling reduces the distance you can pull (60cm), and you’re also pulling away from your buddy which might not be helpful if you’re on a slope or have another crevasse nearby. All cute problems. They just keep coming!

Picture 4: 3 +2 :1 pulley system,
Knots (hindering knots) on the rope)
It is not uncommon to tie hindering knots on the rope, especially if there are only two people on that rope. How useful they are in actually hindering a full fall is dependent on the amount of snow and the snow quality overlaying the actual glacier or for that matter hard layers like ice. The snow has to be deep enough and the right consistency to grip the knot. If the snow is to thin the ropes and knots cut through the snow to the glacier and don’t bit, on the other hand, if the snow is deep enough the hindering knots have a tendency to jam in the snow and reduce the force on you considerable.
It is better explained here: Hindering knots

The participant hops over the hindering knot with prusik and has started to attach the 120cm sling. The participant has disconnected the rope from the second prusik. This isn’t necessary however it does make it easier to see whats what when setting up.
Hindering knots adds a cute problem in rescue. They don’t go thought carabiners or prusiks. At all. In many mini-movies about crevasse rescue, this is often skipped over. In some cases, a knotted rope suddenly is un-knotted without explanation. It’s not possible to untie a hindering knot when the rope is loaded. The only way to do this is by releasing the load and then untieing it.
The way this is done while in a rescue situation is to pull the rope up until the hindering knot is approximately 1m from the belay carabiner. Make sure the prusik (It’s going to have to be a “french” for the next stage) bites and takes the weight of your buddy. Leap your second prusik over the hindering knot and attach a 120cm sling that is attached to the belay to the second prusik (often a klemheist). Slide this prusik as far forward as possible so it is tight with the belay. Now slowly and surely message the french prusik at the belay so the rope glides out (under control) and is taken fully on the second prusik. You are now able to slacken the main rope and untie the hindering knot. Don’t expect it to be easy, the knot has been under force. Once the knot is untied you can make the main rope tight to the first prusik and attach the rope to the second prusik to form 3:1 pulley again and start lifting your buddy a little to remove the 120cm sling. Obviously, you can use a different sling length.
If you are unable to untie the hindering for whatever reason (its jammed solid or frozen) then some more jiggery-pokery is required. Hop over the knot with the second prusik as described above. When the hindering knot comes close to the belay carabiner tie a new french prusik below the knot and massage the first french prusik so the rope glides and is taken up by the other prusik. Once this is complete you can untie the first prusik. It will almost certainly require you to extend the belay carabiner slightly so the hindering knot is on the right side of the belay carabiner. You could use a short sling. Once this is complete you can continue to pull. Phew! lets hope you can untie the hindering knot!
Discussion:
Hindering knots do help in the right snow conditions, however they can be a pain as well. If suddenly you pass thought some ice and need to use some ice screw running belays you are going to have to undo all the knots. Likewise if you transfer from snowy glacier to land and need to protect those glacially smooth slabs before you get to a good belay you can’t until those hindering knots are removed. An alternative is described below.
Having the right knot at the belay carabiner is important. The “French” knot has the advantage that under load you can message it and the rope can glide out. The disadvantage of this knot is the very thing we like about it, this ability to slip the main rope when messaged. If you knock this knot by accident it can start to loosen its grip on the main rope just at the point you would rather it would not. Klemhiest knots are very good at gripping the rope but are almost impossible to release when under load.
Two man rope team (Alpine Climbers)
Alternatively, you could use two ropes which is common practice for alpine climbers. The two-person climbing rope team comprises two ropes (nominally 60m long / 8mm diameter – Think half ropes), standard alpine crevasses rescue system (2 x prusiks, 2 x crabs). You and your buddy tie in at the ends as normal and take coils for 20m, so you and your buddy are 20m apart. One rope is clean (no knots) and forms the rescue rope (the one you’re going to drag your mate up with) and the other is you hindering rope and contains hindering knots like alpine butterflies every 2m or so. These knots hinders the fall as they become jammed in the snow and are very effective in the right type of snow. Obviously, it has to be a snow-covered glacier and depth of snow is also critical. Another obvious fact is the clean rope will require more coils than the hindering rope.
The following picture (picture 5) is of a two-person climbing team system, which is often used in Norway. I have, probably like many others modified it and not strictly followed the Norwegian standard (The modification is the Norwegians don’t tie into the ends but come in 20m and tie-in with a huge overhand knot – I tried to find out why they did this but never got a good answer. I think it has to do with this is the way they do it if they are 3 to 4 people on a rope with the ends of the rope being used as the rescue line – See description later).

Picture 5: Two-person climbing rope team. Clean rescue rope on the left and hindering rope with knots on the right. In this case, we used 1 x 60m combi rope (Goes as single or a double at 8.9mm) doubled up. The photo was taken on Falktind glacier early summer 2018.
Picture 6 shows a demonstration of the rescue set up with this two rope system.

Picture 6: Rescue set up with the two people climbing team.
Number 1 = The hindering rope (yellowy rope), which would be attached as quickly as possible to the first section of the anchor after a fall (number 2 – klemheist knot on an ice screw). In this case, all prusiks where set up on the rope before rescue which is a standard form in Norway. Getting the load from you onto to the first ice screw makes everything so much easier. One your buddy’s weight is on the first ice screw you can set up the belay with another equalised ice screw, or a snow anchor and/or buried axe. In this picture, the guy with the white helmet on the left has set up the belay and started to form the 3:1 system with a klemheist knot (Number 3) and a “french knot” numbered 4 in the picture. As you can see there are loads of rope laying around and this is not uncommon. It can get messy with two ropes and there can be massive amounts of rope mess unless your well organised.
Discussion:
In this situation your first prussic (number 2) can form your back-up to the main haul system. Obviously there is a lot of rope about and organisation is key.

Picture 7 Snow anchor and ice ax belay
In picture 7, the participants have placed both a snow anchor (deadman) and ice axe to form a solid belay.
This is a standard Norwegian method. It might seem overkill in wet summer snow, however, it is good practice as a climber with climbing axes might need to bury both to get a good enough belay.
In this case, the snow anchor is placed first. Then the anchor is clipped into the ready-made prusik. When transferring the weight from your body onto the anchor its is important to do this gradually and in control with your eyes darting back and forth from the prusik and snow anchor to see both are holding. In the case of the prusik if it doesn’t grip it will normally need dressing properly or wrapping around the rope some more, while the snow anchor will normally fail catastrophically without warning, and it is, therefore, important to be ready for this eventuality as failure of the belay will transfer all the weight of your buddy back to you. Be prepared! Be ready!
Obviously, if you have never built an ice axe belay while laying face down in the snow with your buddies weights trying to pull you down the same crevasse he has fallen then its worth trying with a safety back up a belay and a few friends around to help out if everything goes crazy 🙂 Its a real eyeopener.
The following picture series shows Alex using a two-person climbers team set up after a person has fallen into a crevasse. In this case, I set up a pulley to form the fallen climber. He is using a single axe as the snow anchor.

Crevasse rescue – Alex makes an axe belay. I used a back pulley to form the weight of the fallen climber as there was only two us.

Burying the axe. Alex has buried his axe with snow to make absolutely sure its bomb proof. Still, face down! Still bearing all the load on his legs, harness and hips!

Clipping the anchor into the prusik…. Or trying to…. In this case, a small mistake when setting up, in the beginning, resulted in Alex having to tie a new prusik. Cute problems happen in improvised rescue. Solution? Improvise. In this case, the screw gate carabiner, which was being used to fix and direct the coiled rope had turned to face the body, entangling the rope and prusik into a nice mess. Not easy to undo when holding the weight of your buddy face down in the snow.
Phew! Clipped into the belay at last. Things get much easier now your buddies weight is off your body.
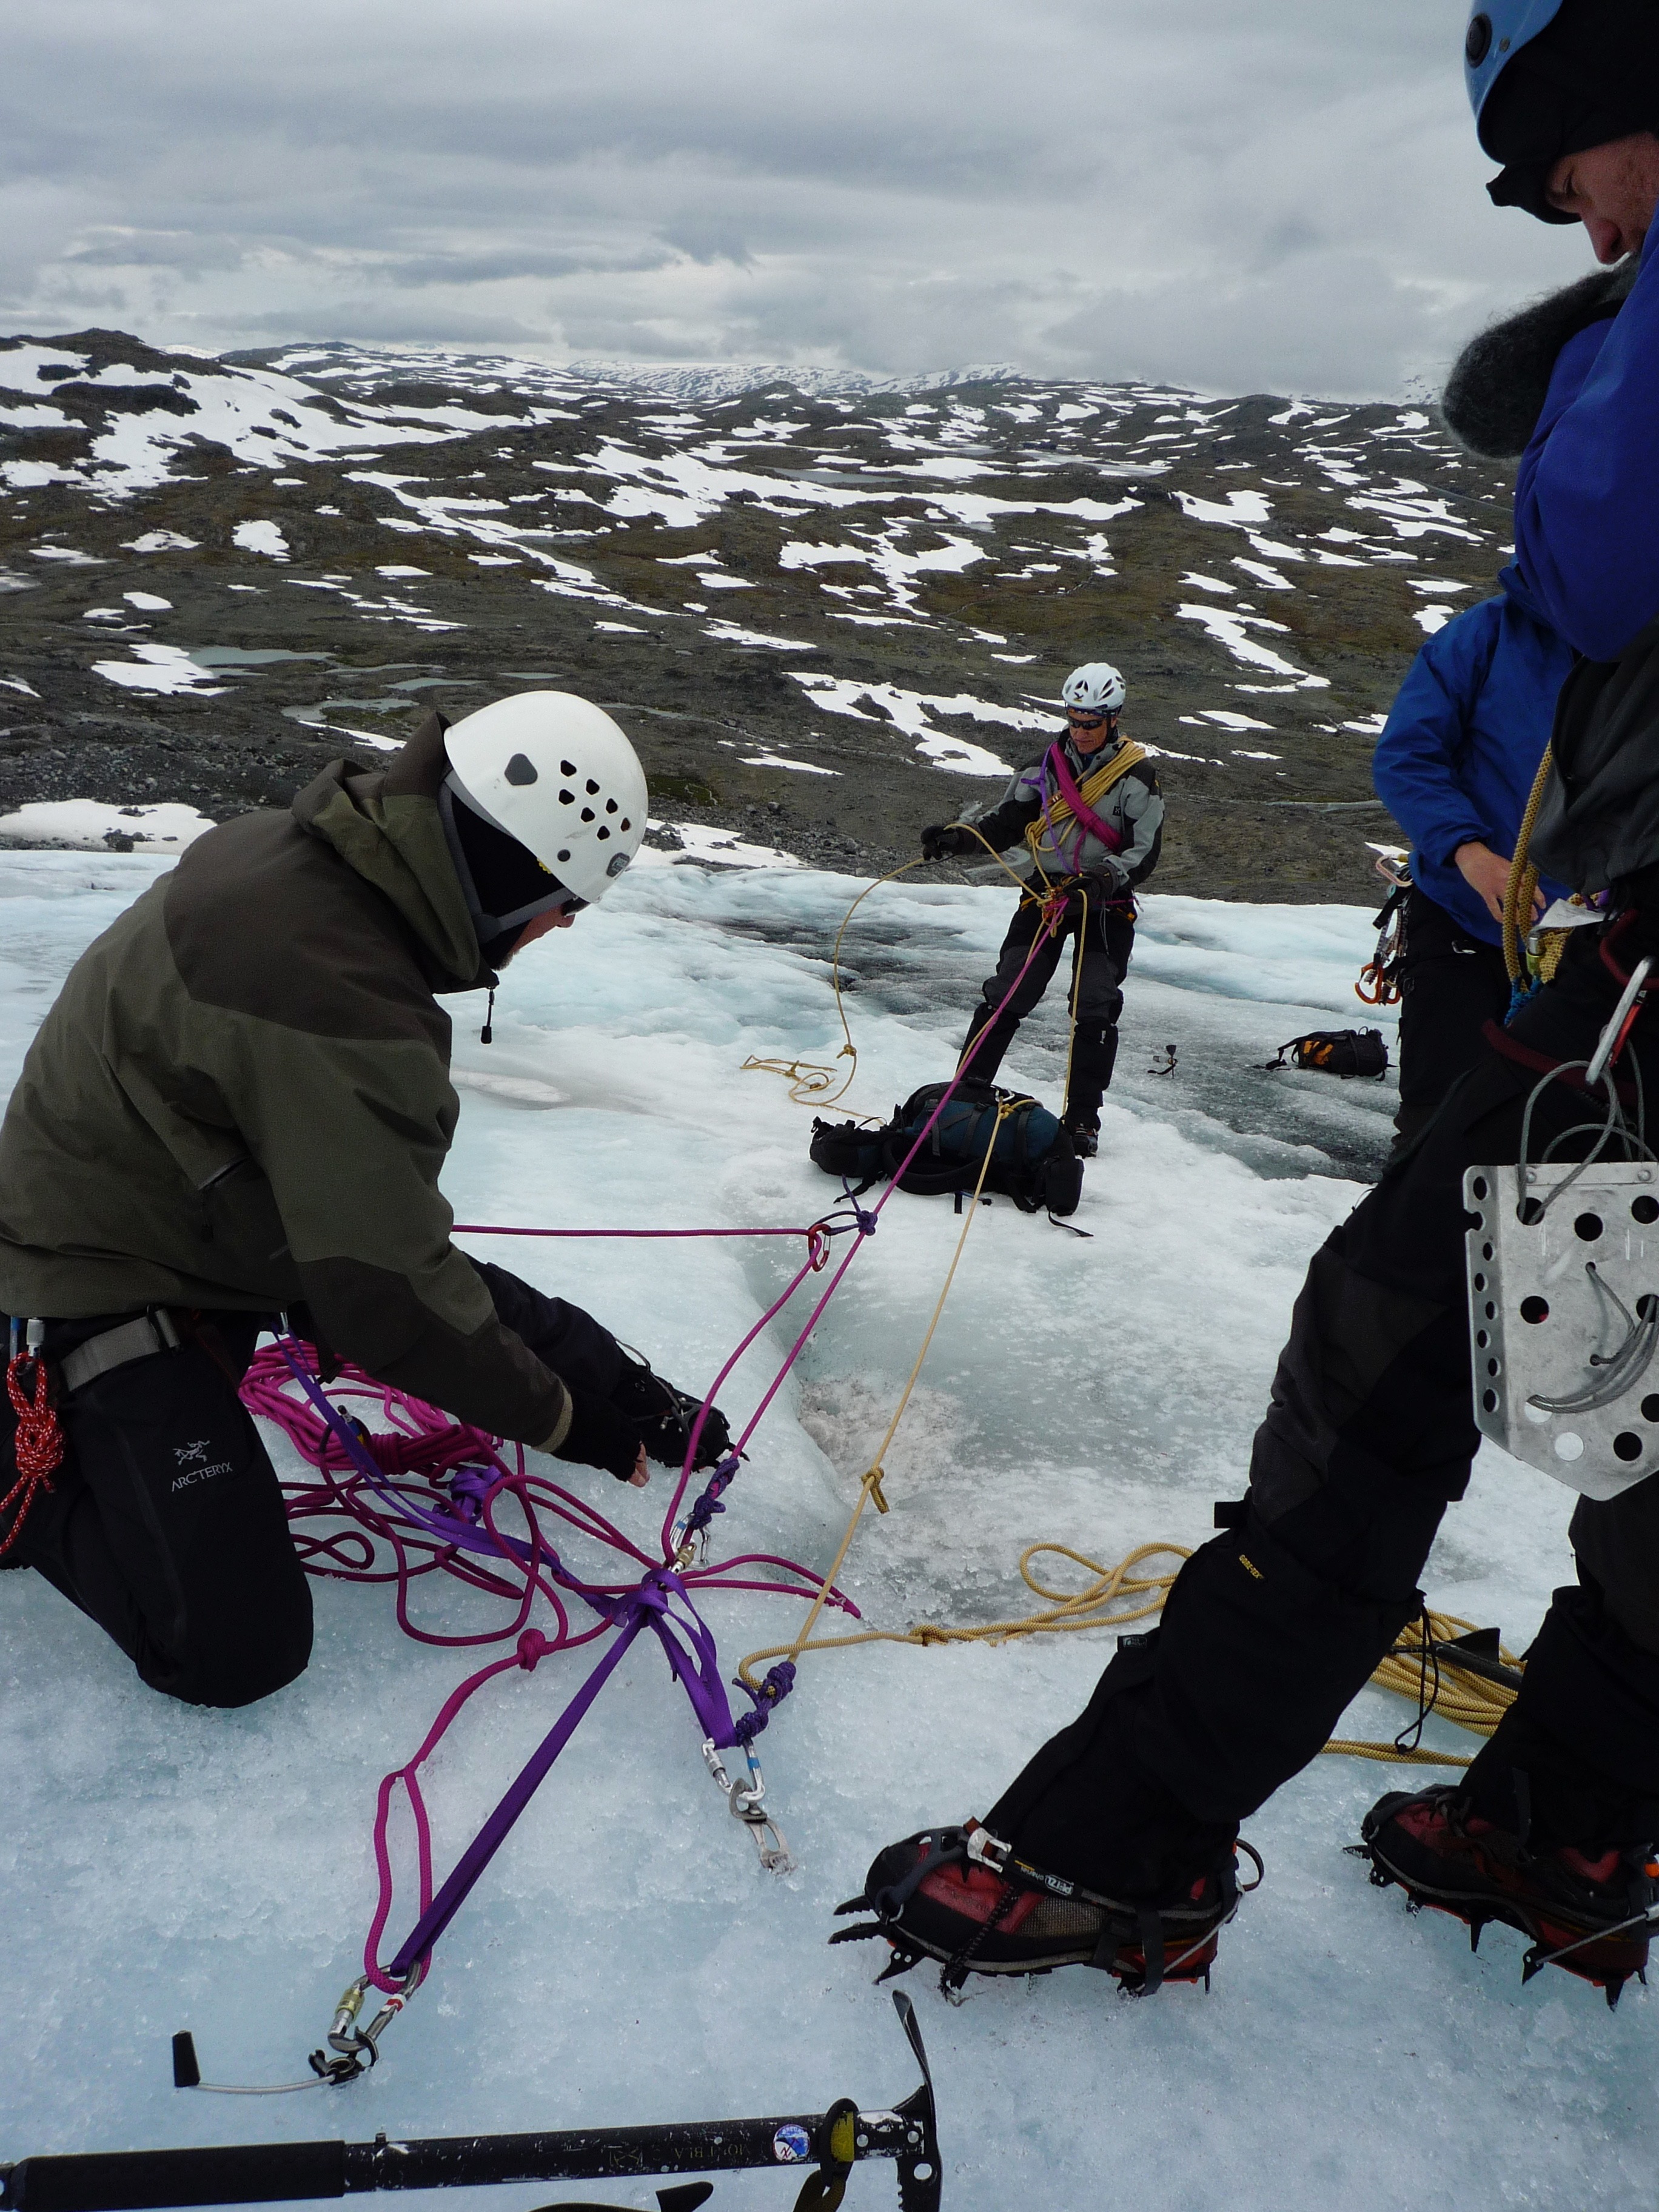
Rescue with three or more people on the rope:
With extra people, things get much easier. More pulling power. The downside? To quote an old English saying: “Too many cooks spoil the broth”. More people require an element of organisation and while all members of the group might feel they are experienced and skilled in buddy rescue you might find you are the only one in practice. Couple this with the fact that laying at the end of the rope screaming is someone’s partner and suddenly a nice walk in the mountains requires a high level of technical skills and people management.

Crevasse rescue with 3 or more people on the rope. A person has fallen in. The second and third person take the load. The second person is know trying to place an ice screw to form the first belay. The guy standing straight with his back to the camera is an instructor with the safety rope.
In this scenario, we have three people on a single rope, which is not uncommon if you’re crossing a glacier on a general mountaineering trip that does not require any technical climbing during the tour.
Basic equipment per person:
2 x prusiks
1 x snow anchor ( or just an ice axe)
1 x ice screw
Team equipment:
A single rope.
The basic set up is for 3 people on the same rope; The second person in the group ties in the middle of the rope (often with a overhand knot on the bight – A fig 8 would be to big) and then the two other people tie in 8m or so from this person. The rest of the rope is coiled up over the shoulder or stored in the rucksack. The end people have a 1x prusik on the rope, while the middle person has 2 x prusiks (one on each rope going to the buddies).
When a person falls into a crevasse the other people brace and stop the fall. Often enough if they are quick and have good rope discipline they could just drag there buddy out. If this is not possible and said buddy can’t climb out with the help of there buddies the second person makes an anchor with the ice screw or snow anchor and attaches the relevant prusik to the rope. They transfer the weight gingerly onto the belay with the aid of the third person, once this is done and it works the third person can come forward and set up the rescue belay. If there are only 3 people its probable best to set up between the second guy and the crevasse so the second guy can help pull as well as take control of there own back-up belay. The third guy set up the belay and attaches the end of the rope to the belay and drops a loop of rope with a friendly screw gate carabiner to the buddy in the crevasse who clips this onto the central loop on there harness. They can also put a rucksack under the rescue rope to stop it cutting into the snow at the lip of the crevasse. The other end of the loop is brought back to the rescue belay and a prussic is attached to the rope. Sometimes I have seen people attach this prussic onto a 60cm sling others have used a French prussic direct on the carabiner. Both work. Both have advantageous and disadvantageous. Now it set up. Phew. Lets get pulling. The second and third person can pull on this 2:1 system and if you buddy in the hole can help they can also pull on the right rope to aid the up and out. Once you have pulled up a bit the second person can take up the slack on the main line though there prussic as a back-up.

Crevasse rescue with 3 or more people. The second person (red jacket on the right) has place the ice screw and taken the load on a prusik. The third person (orange jacket on the left) places the second ice screw to form the rescue belay.
Discussion:
This system is very simple although it might seem complicated, and requires the minimal of equipment. It does require the people on the topside to work together and if they don’t have the technical skills to make it work be able to take instruction on how.
Normally the second person on the rope is the leader and will become the boss when things go crazy.